For this project I am modeling the middle sword in these concept drawings
Week 1 - Blockout
Weel 2 - Highpoly and retopo
Week 3 - Textures and lookdev


For this project I am modeling the middle sword in these concept drawings
Week 1 - Blockout
Weel 2 - Highpoly and retopo
Week 3 - Textures and lookdev
Please cut me some slack ill update it im experiences technical difficulties
For this week I ended up revisiting the sculpt. Some of the biggest problems with it were the eyelids, neck and outfit. I ended up cutting the rest of the torso and redoing the collar along with re-sculpting the neck and I believe the bust reads much nicer and presents better.
Week 1 - First pass textures for skin
first pass on textures for the skin. Skin is a very complex and requires a lot of layered detail to achieve a believable look. I will be looking at Jhills and Jared Chavez videos on how they make their skin.
Week 2 - First pass textures for clothing
My sculpt mainly consists of 3 parts, the head and the outfit and the hair. The hair is my research project and is technically separate from this one so therefore it is in my best interest to break up this project as much as I can to avoid having a bunch of work due all at once. That said the second week will be focused on clothing textures. So I will be constructing metal, leather and fabric materials.
Week 3 - Second pass on textures for skin and clothing.
With A strong first pass established on both clothing and skin, I believe it would be beneficial to tweak both and move between both getting a bit done for both so I can get an overall quality increase across the board for both.
Week 4 - Finish textures and Look-Dev
I will spend half of my time finalizing textures and then look-deving to make improvements to the textures.


Yoyoyo want to sculpt realistic skin? check this out. For this tutorial I am using Jhills skin brushes and textures, these brushes are really good and I used them for pretty much the whole tutorial. Definitely recommend them. This tutorial also assumes you have a basic understanding of morph target and layers so keep that in mind. This is pretty much just to give you the gist of the workflow for how to construct believable skin.
- Disclaimer - I figured this out by just watching Jhills videos on detailing skin in zbrush so big shoutout to him. If you are a character artist you should really watch his videos
If you want a much better understanding of the process watch this
https://youtu.be/HlHoIGE2Ocs
And if you want the brushes you can find them here
https://artofjhill.com/store/AROb/skin-details-kit


Next, go to surface and check noise. Then go to edit.

this is the noise menu. In the bottom left corner hit the alpha box and put in a pores texture in there. in the menu for options you can mess around with alpha scale to change the size of the pores. I used a size of 0.39 for my guy but it varies from character to character. Women also tend to have smaller pores so also factor that if you are making a female character.


This sprint I finalized (for real this time!) lowpoly model and began UVs. Since I couldn't get her posed in time and in substance I blocked out colors in zbrush.


For this week I ended up revisiting the sculpt. Some of the biggest problems with it were the eyelids, neck and outfit. I ended up cutting the rest of the torso and redoing the collar along with re-sculpting the neck and I believe the bust reads much nicer and presents better.
Week 1 - First pass textures for skin
first pass on textures for the skin. Skin is a very complex and requires a lot of layered detail to achieve a believable look. I will be looking at Jhills and Jared Chavez videos on how they make their skin.
Week 2 - First pass textures for clothing
My sculpt mainly consists of 3 parts, the head and the outfit and the hair. The hair is my research project and is technically separate from this one so therefore it is in my best interest to break up this project as much as I can to avoid having a bunch of work due all at once. That said the second week will be focused on clothing textures. So I will be constructing metal, leather and fabric materials.
Week 3 - Second pass on textures for skin and clothing.
With A strong first pass established on both clothing and skin, I believe it would be beneficial to tweak both and move between both getting a bit done for both so I can get an overall quality increase across the board for both.
Week 4 - Finish textures and Look-Dev
I will spend half of my time finalizing textures and then look-deving to make improvements to the textures.


For this project I will be continuing to work on my Dishonored Bust. I will be taking the time to focus on the textures.
Week 1 - First pass textures for skin
first pass on textures for the skin. Skin is a very complex and requires a lot of layered detail to achieve a believable look. I will be looking at Jhills and Jared Chavez videos on how they make their skin.
Week 2 - First pass textures for clothing
My sculpt mainly consists of 3 parts, the head and the outfit and the hair. The hair is my research project and is technically separate from this one so therefore it is in my best interest to break up this project as much as I can to avoid having a bunch of work due all at once. That said the second week will be focused on clothing textures. So I will be constructing metal, leather and fabric materials.
Week 3 - Second pass on textures for skin and clothing.
With A strong first pass established on both clothing and skin, I believe it would be beneficial to tweak both and move between both getting a bit done for both so I can get an overall quality increase across the board for both.
Week 4 - Finish textures and Look-Dev
I will spend half of my time finalizing textures and then look-deving to make improvements to the textures.

https://youtu.be/s0DhvFML7oM
https://youtu.be/GcI60mKZU0k
Video Resources
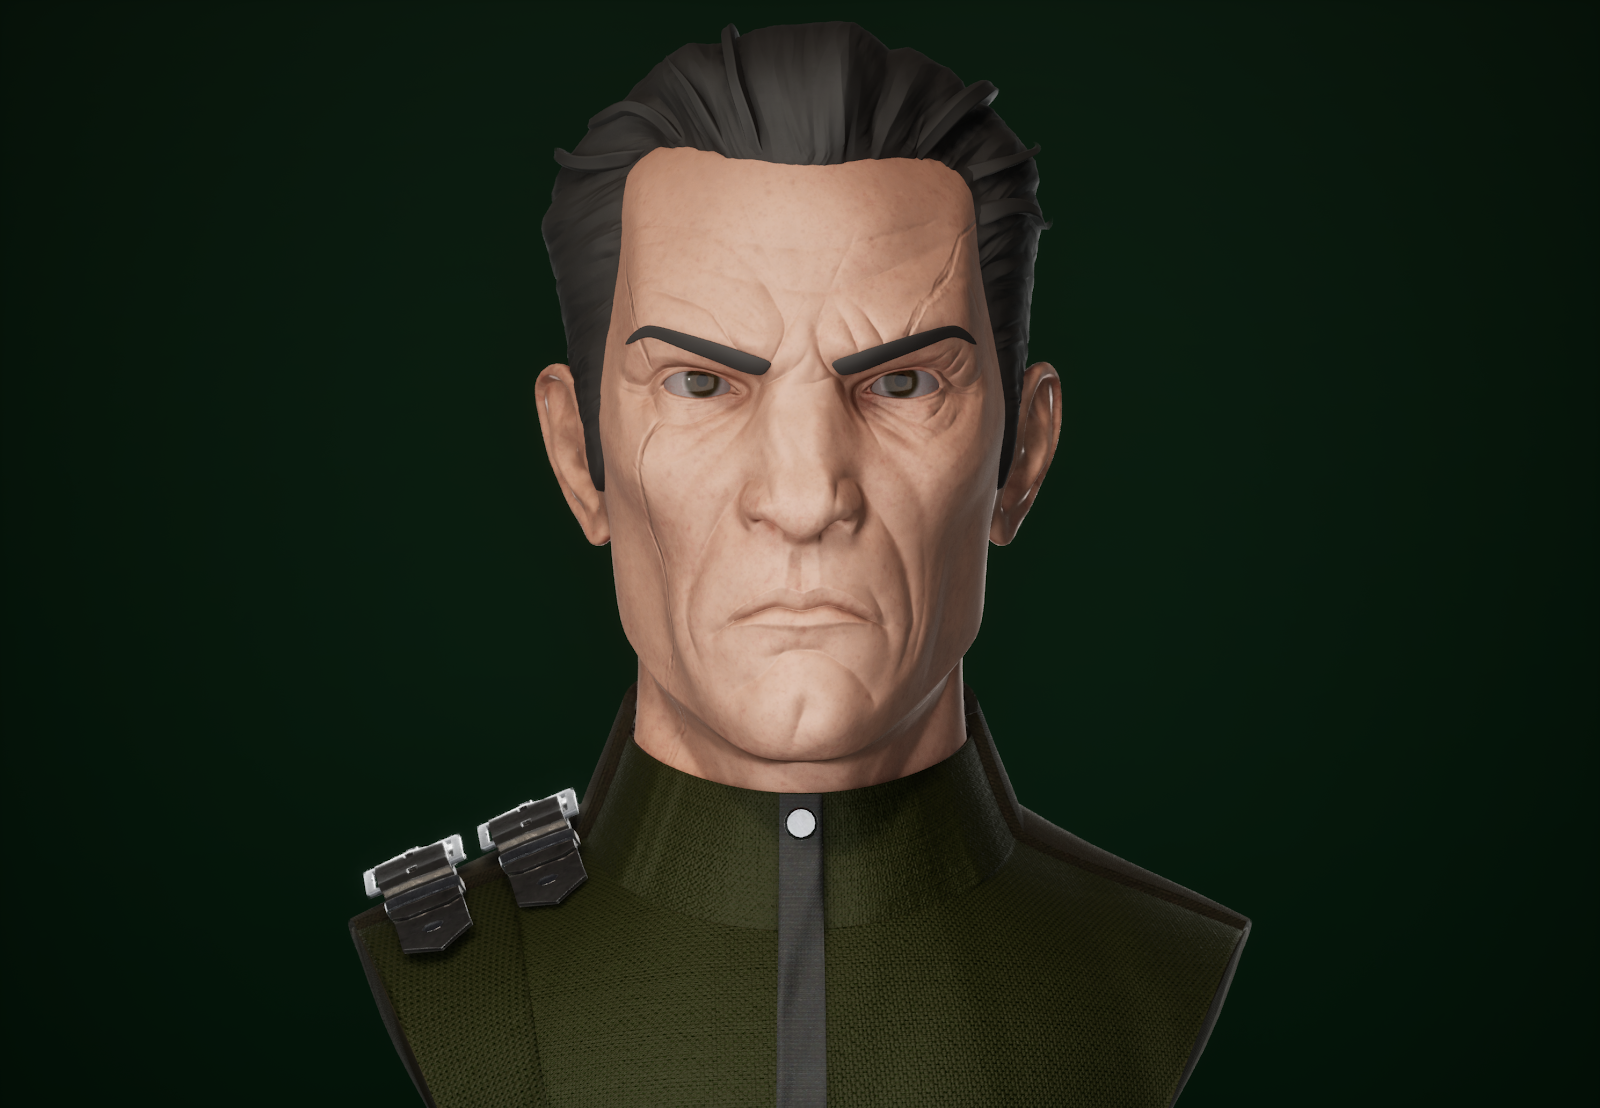


This is what I have for this turn in, unfortunately between Tuesday and Thursday there was no time to make any substantial changes as prepa...


